IoTRoutes Workflows
Workflows in IoTRoutes automate data processing and system actions. They can react instantly to IoT events or execute periodically according to a schedule. Each workflow is composed of triggers, actions, and conditional paths, defined visually through the Workflow Designer.
There are two types of IoTRoutes workflows :
1. Immediate Workflows
Triggered automatically by events occurring in the platform, such as:
- Receiving new device messages (batch or single)
- A device connection or registration
- Threshold or condition reached on an attribute value
Used for data ingestion, message transformation, and device lifecycle events.
2. Scheduled Workflows
Executed at defined intervals to perform periodic tasks:
- Generating device reports
- Cleaning or archiving logs
- Sending scheduled commands or notifications
- Synchronizing with external systems
The screenshot below shows a screen of the list of workflows accessible via the menu Application Settings >> workflows
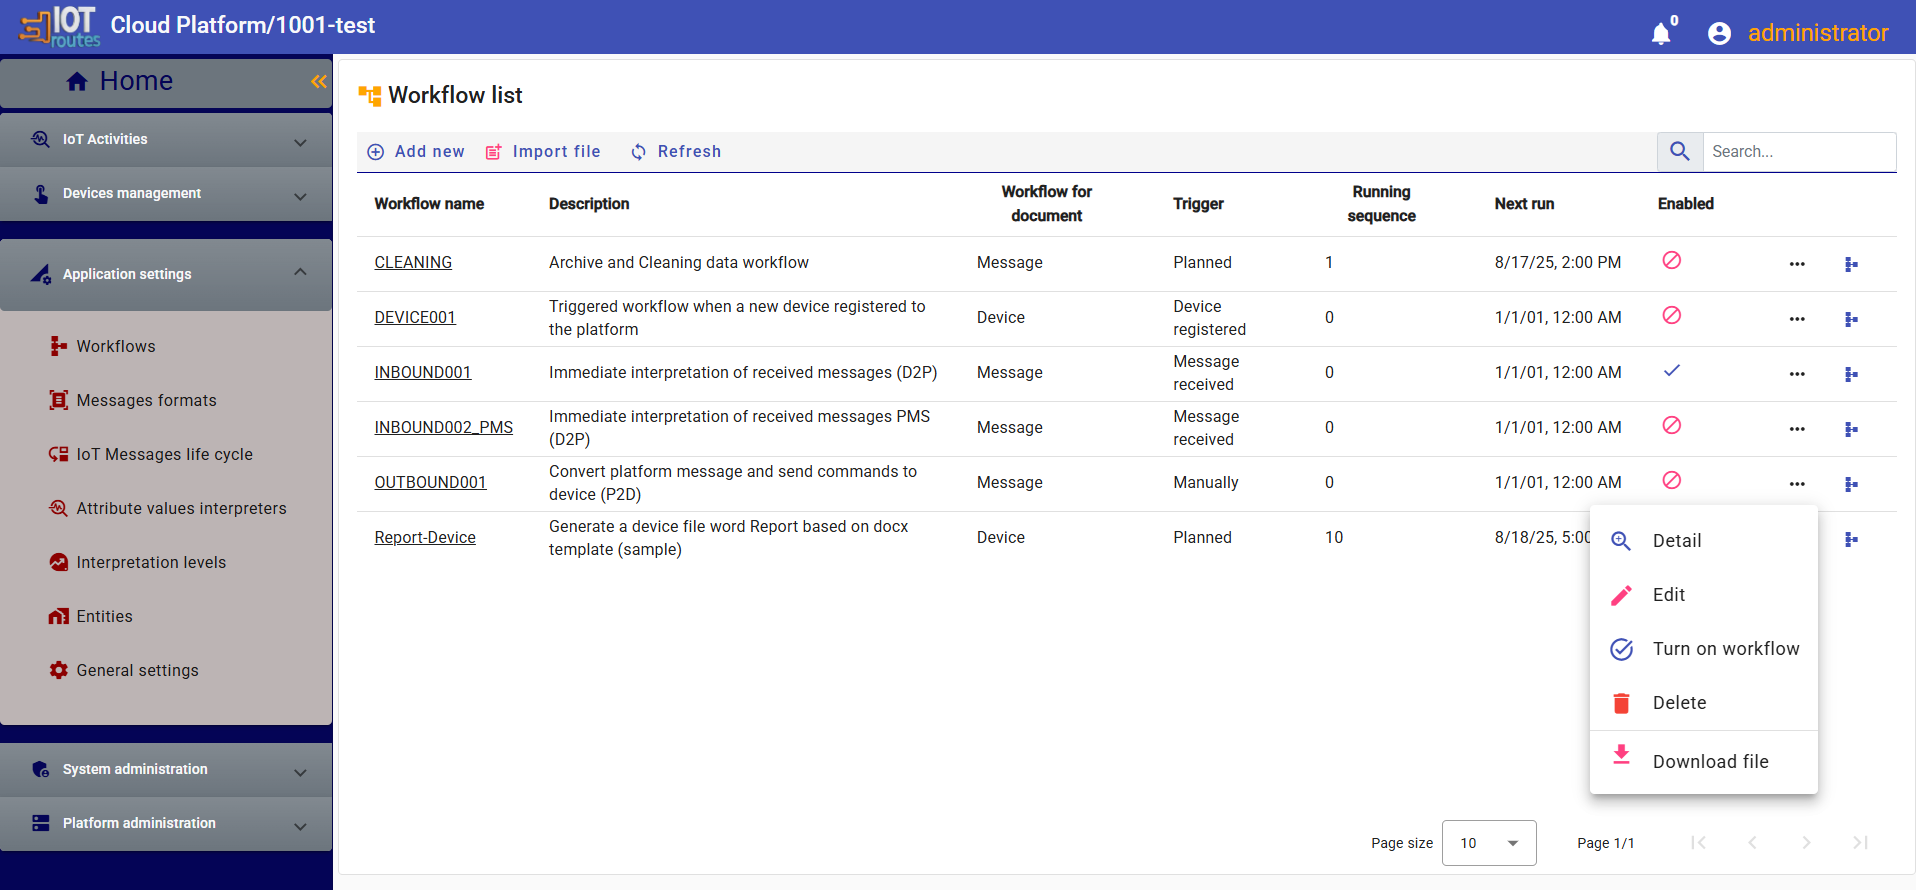
IIt is possible to create a workflow manually or to import it using the "Import file" button. This import file is usually generated by exporting an existing workflow via the actions menu, by selecting "Download file". This approach allows you to design, test and validate a workflow in an isolated environment before deploying it in production, once the process has stabilized.
Built-in Workflows
Below is a list of out-of-the-box workflows in the IoTRoutes platform. You can then customize them or add your own workflows.
- INBOUND001 : A workflow automatically triggered upon receiving a batch of IoT messages in the queue. It handles the conversion and interpretation of the messages, then performs an acquisition action by recording the received values in the attribute log of the corresponding device.
- INBOUND002_PMS : A reception workflow designed for messages in the Platform Message Structure (PMS) format. Unlike other workflows, it does not require a conversion step, as the messages already comply with the expected format. It directly handles their processing and records them in the system.
- OUTBOUND001: Designed for sending data or commands to IoT devices or external systems. This workflow ensures the preparation, formatting, and transmission of outgoing messages, based on defined business rules and appropriate communication protocols.
- DEVICE001 : A workflow automatically triggered upon the first connection request from a new device. It initiates the registration and initial configuration process of the device within the platform. If necessary, it also ensures administrator approval to authorize the device to begin sending or receiving messages.
- CLEANING : A maintenance workflow responsible for deleting old logs, cleaning up obsolete value history, and archiving IoT messages dated prior to a defined point in time. It helps optimize system performance while ensuring relevant data is retained in a dedicated archive space.
- Report-Device : Is an example of a scheduled workflow, executed at predefined times, which generates Word or PDF reports for a selected set of devices. This workflow automates report creation and distribution, making it easier to monitor and analyze device data.
Workflow detail page
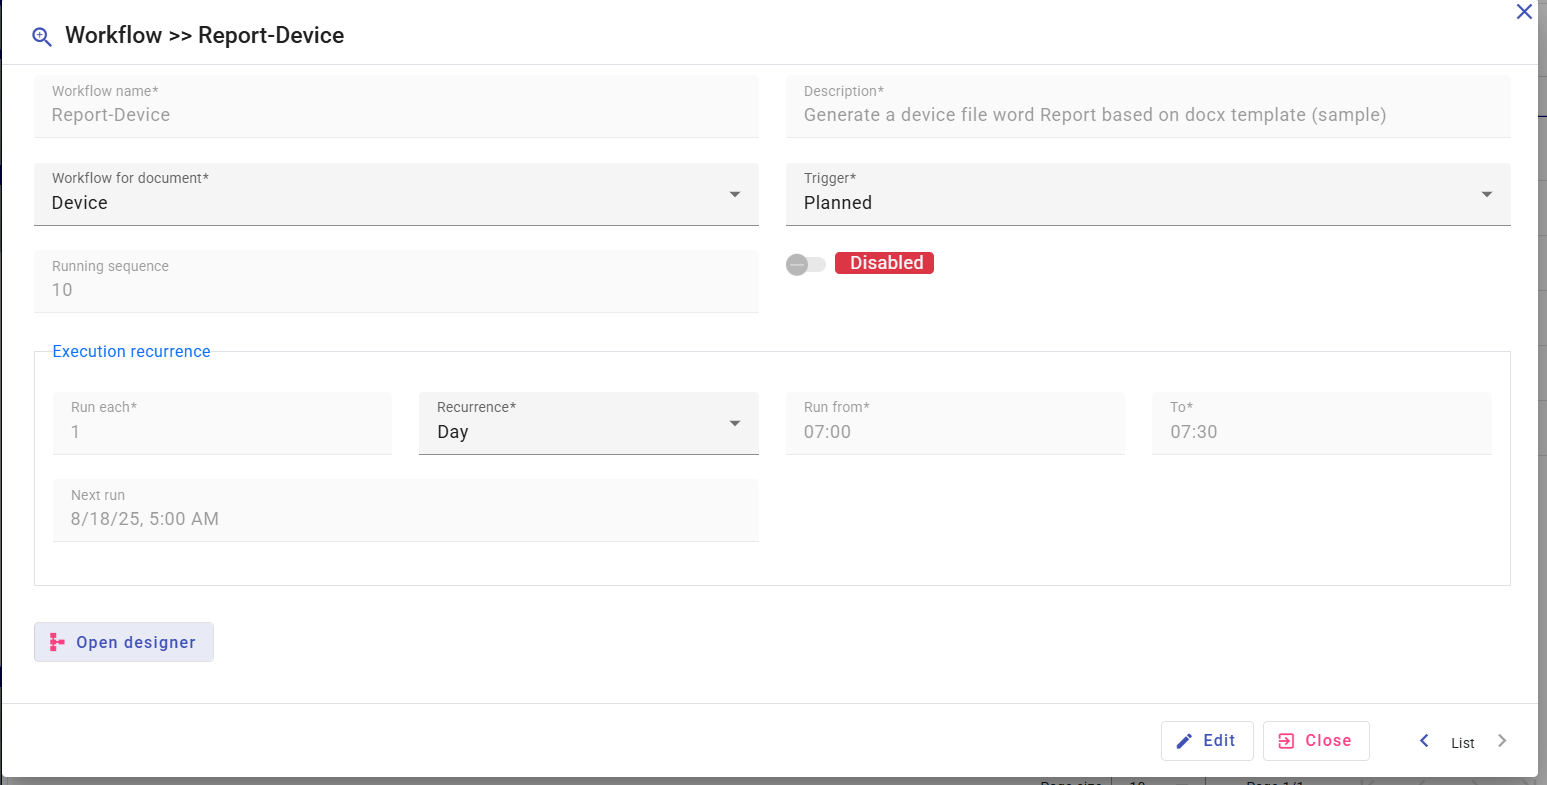
The workflow detail screen contains the job definition information and the execution trigger or recurrence depending on the type.
A workflow always runs within the context of a specific document. For example, the "Message" document is used for workflows triggered by received or sent IoT messages, while the "Device" document is used for workflows associated with a specific device.
- Example of a planned workflow detail:
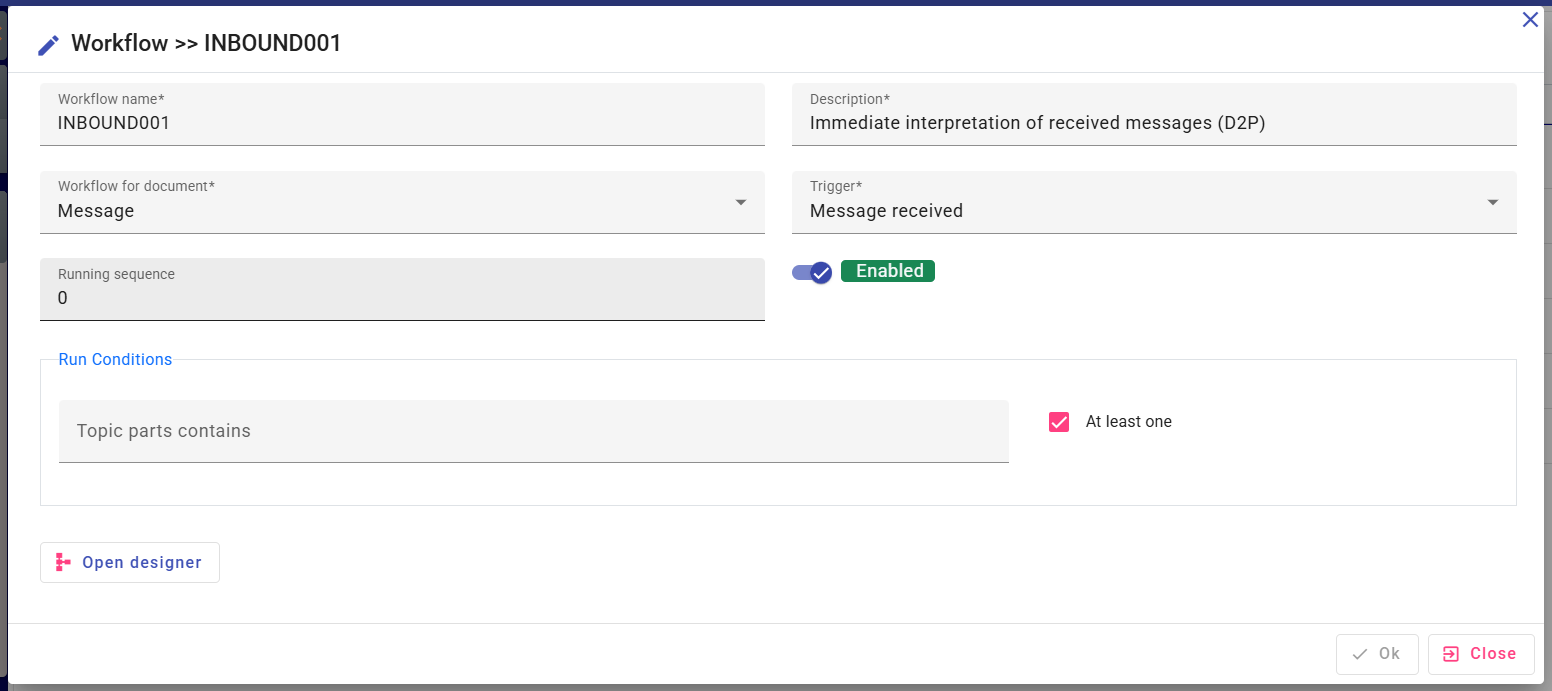
- Example of workflow triggered of received messages
Workflow designer :
The Workflow Designer is accessible from the actions column in the workflow list or via the detail screen. It allows to model a process using simple drag-and-drop, while defining the properties and interactions specific to each step.
Once executed, the workflow instance has a complete context, including the current document (Message or Device), workflow variables, and application information. The screenshot below illustrates the different components visible in the Designer.
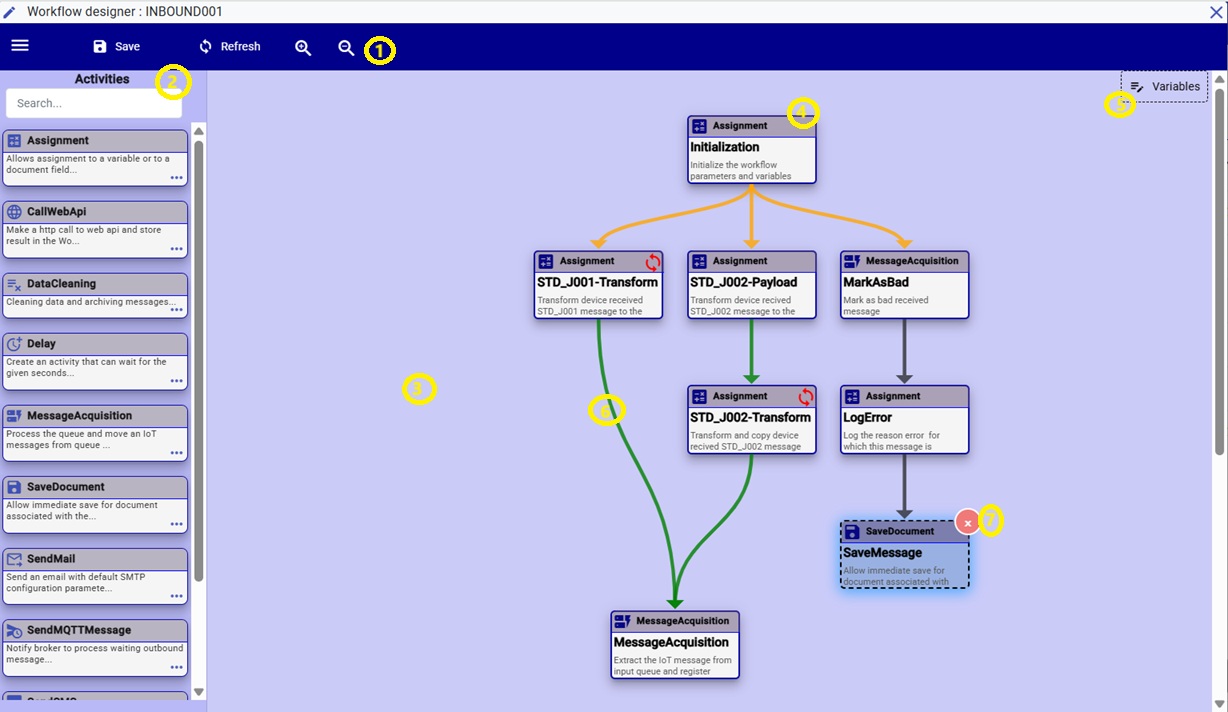
- The toolbar provides options for saving, refreshing the view, and adjusting the zoom level.
- Available activities list pane which are the actions to be performed for a workflow step.
- The Diagramming Pane is the process modeling workspace. Activities can be added by darting and dropping from the pane on the left and their connections and properties can be defined.
- A dropped activity represents a step in the process that will be linked to other steps. Double-clicking opens the properties window, which allows configuration of the activity. More details on configuration are provided later in this chapter. Right-clicking displays the delete button (No. 7).
- Workflow variables are used to define temporary data storage elements that can be utilized during the execution of the workflow.
The connection between activities illustrates the transition from one step to another. There are four types of transitions, each identified by a specific color:
- Default transition (no condition): blue arrow
- Success transition: green arrow
- Failure transition: red arrow
- Conditional transition: orange arrow
Right-clicking on an arrow opens the corresponding configuration window, in the “Connection” tab.
Activity detail
This screen appears to configure the behavior of activities and their connections. It contains three tabs:
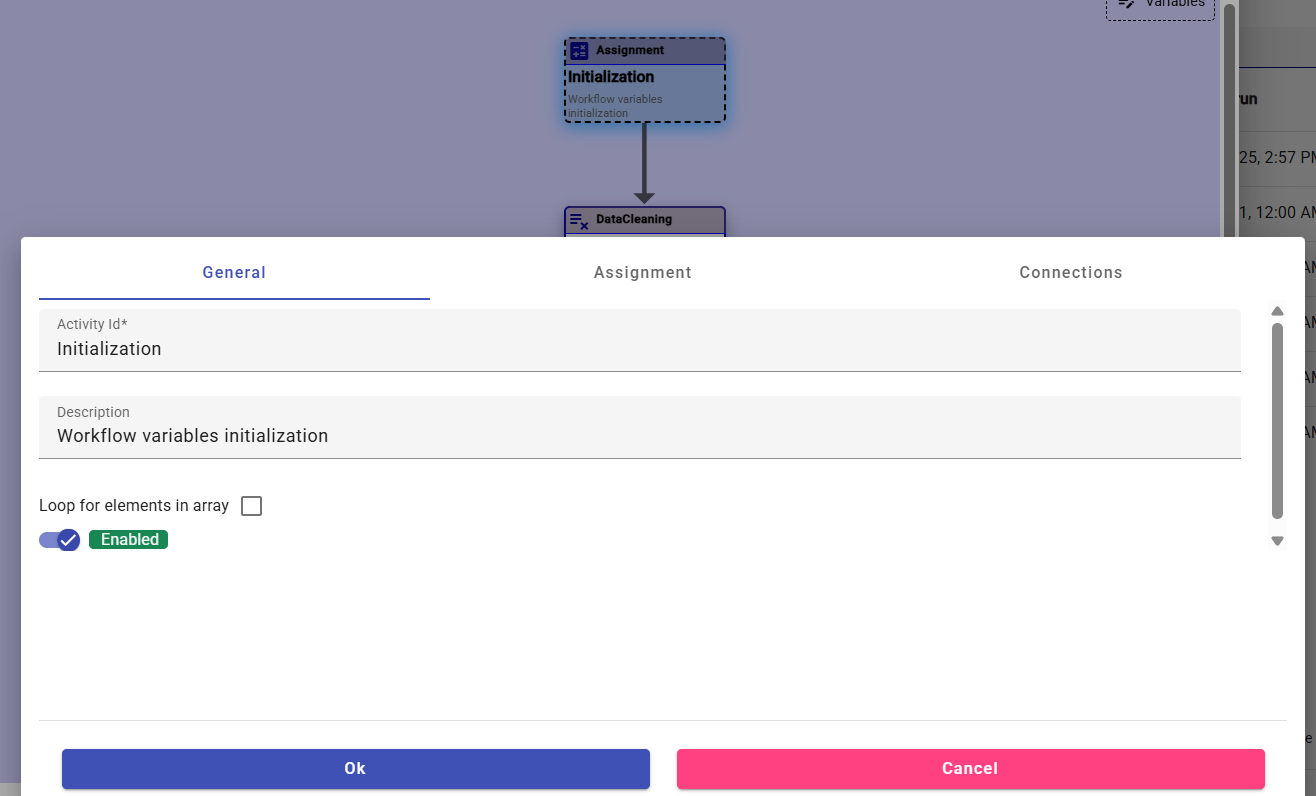
- General tab : Information describing the activity such as the name in the process, the description and whether the step should be executed in a loop and if so, the table over which the activity should loop.
- Connections tab: Allows you to customize connections between activities and define transition types or conditions.
- Acitvity detail tab: The information in this tab depends on the nature of the selected action. It displays the properties and parameters of the activity. For example, for a 'SendMail' activity, it shows text boxes to enter the recipient and the email body based on the workflow context.
Expression Editor
The expression editor helps the user build formulas or queries to retrieve data from the context. It allows the creation of mathematical equations (such as multiplications, additions, etc.) as well as more complex statements, like conditions or assignments to variables.
Expression Editor allow also to run out of the box functions like Api Calls, Object conversion or Json management .
Used at various levels of workflow modeling, it contributes to creating flexible, dynamic, and reusable workflows.
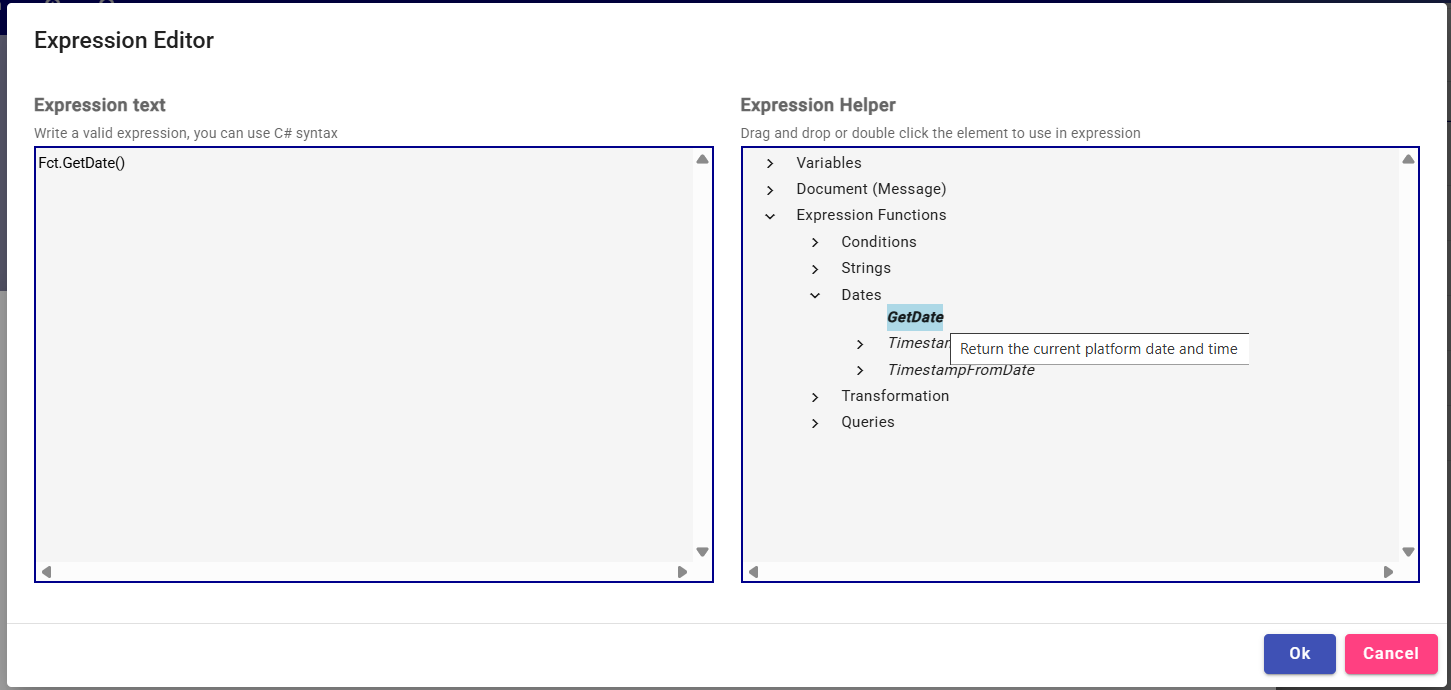
The expression editor is composed of two distinct sections:
Left panel is dedicated to the publication of the expression itself.
The right panel acts as an assistant. It displays a tree structure containing available functions as well as context data, such as workflow variables and the current document.
Double-clicking on a node automatically inserts the corresponding element in the editor, at the selected location.
The document visible in this pane represents the instance of the main object that triggered the workflow, such as an IoT message or a Device.